

This year, I upgraded the construction paper chain links to a leafy garland. Here is a simple tutorial for you to count your blessings in November with a garland.
Supplies:
- paper - white, scrapbook, paper bags, construction, printer, etc.
- scissor
- pencil
- pens
- raffia

2. Trace the leaf pattern on various different types of paper. Trace 30 leaves for each day in November.
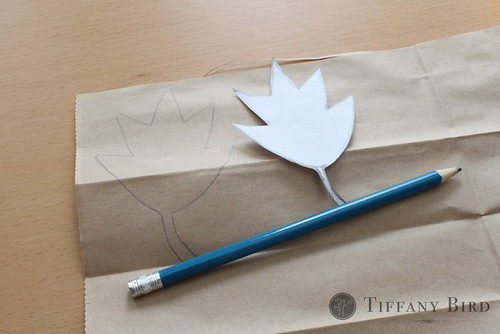
3. Crumble the paper with the tracing on it. Then smooth out and cut.

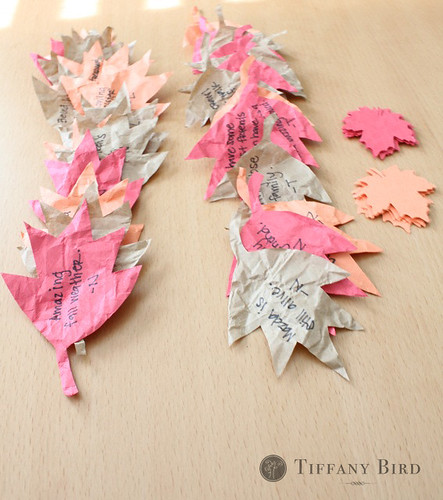
4. Give each family members a few leaves and have them write their blessings.
5. This is an optional step, but it makes the garland look fuller. Cut out smaller size leaves to put in between the large leaves. Luckily, I had a large leaf punch.
6. Gather about 6 or 9 strands of raffia then tie a knot on one end.

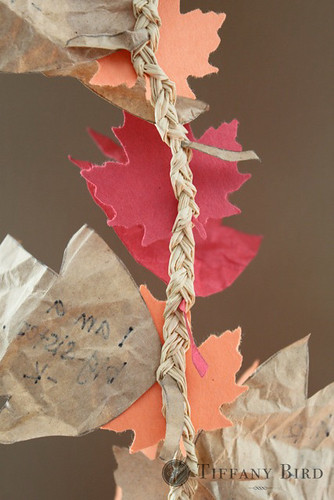
7. Begin braiding. Braid about 3-4" before adding leaves into your braid, sticking the stem of the leaf into your braid.
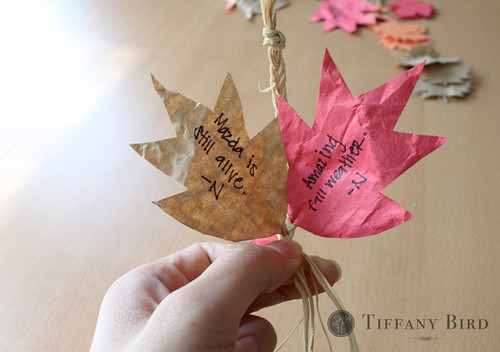
8. If you are using the small leaves for a fuller garland, insert the small ones into some of the braids between the larger leaves. Keep going until all the leaves are gone or you have reached your desired length. Make sure to do 3-4" of plain braids before ending the raffia with a knot. If you need a longer length, add more raffia into the braid.
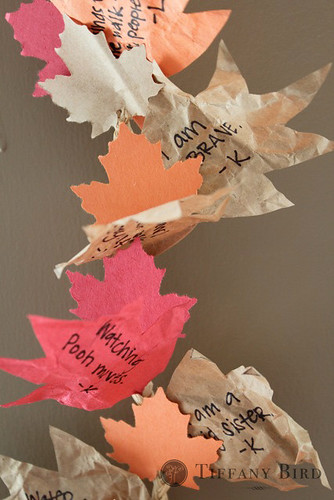
A back and finished view of the garland.

This is so pretty and creative! Great idea!
ReplyDeleteGorgeous!!! I love the braided raffia!
ReplyDeletethat is awesome! what a great idea.
ReplyDeleteTiffany,
ReplyDeleteThank you so much for posting. I love this idea. I am very excited to implement it at our house.
I really like how this turned out. So simple and elegant!
ReplyDeleteWhat a beautiful idea. Women like you inspire me. Thanks!
ReplyDeleteWhat a great idea! TFS!
ReplyDeleteWhat a clever idea! We've done leaf wreaths before, but I really like garland for a change. Thanks for such a fun project with the kids.
ReplyDeleteThis is such a great idea!! Simple, pretty, and meaningful!
ReplyDeleteI featured it in my post here: http://www.momendeavors.com/2010/11/fabulous-fall-leaves.html
I absolutely love it! Going to start prepping leaves to make one too! Thanks! :)
ReplyDeleteIt's very nice! We are not going to celebrate Thanksgiving as we are a Catalan family in Barcelona and here is no tradition, but I'm thinking about cooking a special meal and telling my little ones that we can set a special day for saying "Thanks". It could be really useful for their education and nice for all the family.
ReplyDeleteThanks for sharing!
This is beautiful. And we still have time to do it... Thank you!
ReplyDelete